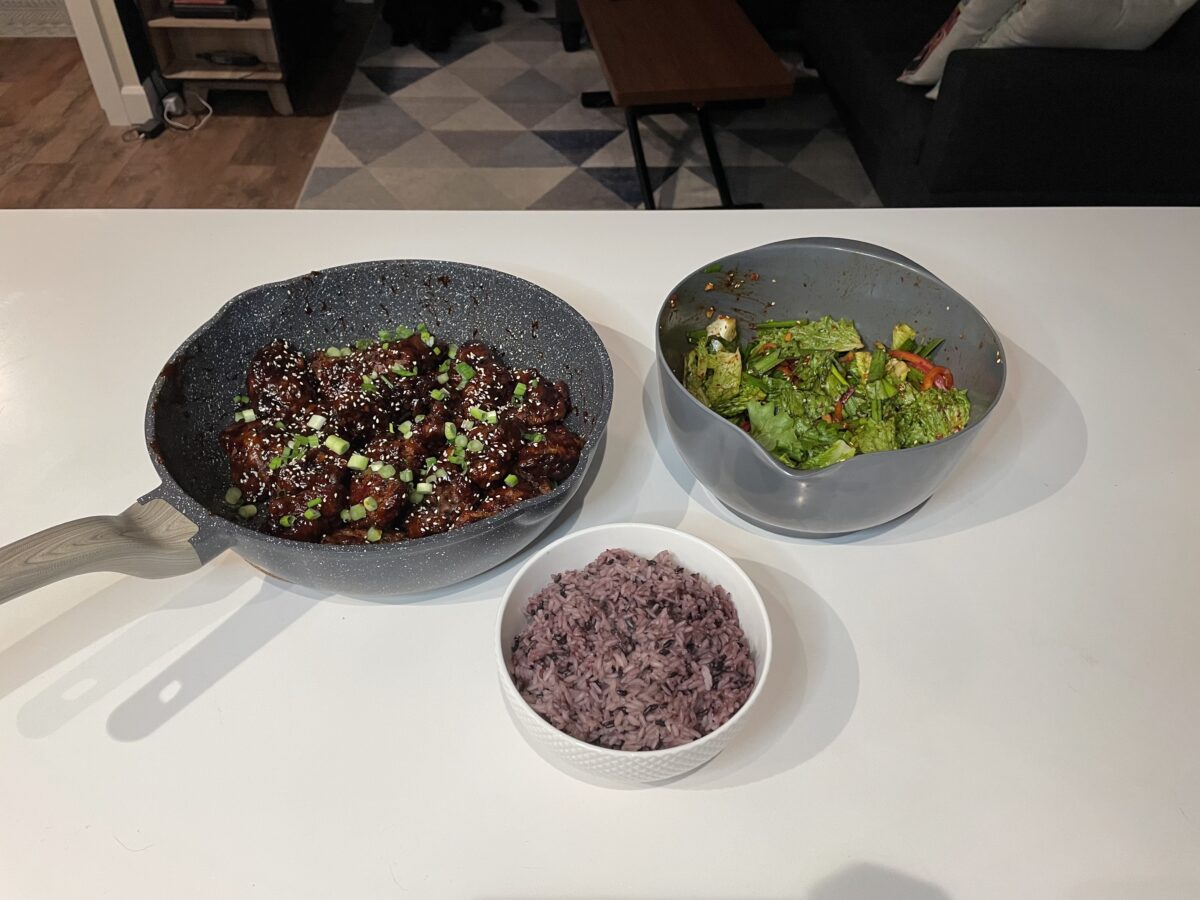
Yangnyeom-Chikin: A Spicy-Sweet Adventure
When I first thought about blogging about my food experiments, I knew I needed a central theme to organize my thoughts. Fried chicken came to mind—perhaps a bit overdone, but undeniably versatile and endlessly exciting. From crispy, golden crusts to unique spice blends, fried chicken offers a world of culinary possibilities, with flavors as diverse as the cultures they come from.
Before committing to this post, I tried my hand at a few variations, including KFC-style fried chicken and Vietnamese fried chicken. But for my first official blog entry, I decided to document my attempt at Yangnyeom-Chikin—Korean fried chicken glazed in a deliciously sticky, spicy-sweet sauce.

CUISINE
Asian
DIFFICULITY
Easy / Beginner
A Bite of History: How Yangnyeom-Chikin Became Iconic
Yangnyeom-Chikin has its origins in the 1960s and 1970s, when Western-style fried chicken was introduced to South Korea during a period of rapid economic and cultural transformation. At the time, fried chicken was a rarity, but as cooking oil became widely available, it gained popularity.
In the 1980s, Korean chefs began making the dish their own. Yangnyeom-Chikin, which translates to “seasoned chicken,” was born. It features crispy, double-fried chicken paired with a flavorful sauce made from ingredients like gochujang (fermented chili paste), soy sauce, and sugar. This iconic dish is often enjoyed with beer, becoming a staple of South Korea’s chimaek culture—”chi” for chicken and “maek” for beer.
Special Ingredients
Most of the ingredients I needed were readily available at my local Loblaws, but a couple of key items—gochujang and gochugaru (Korean chili flakes)—required a visit to Toronto’s Korean grocery store, PAT Mart (patmart.ca).
My Attempt to Make Yangnyeom-Chikin
Step 1: Prepping the Chicken
I opted for skinless, boneless chicken thighs and began by brining them for 12 hours in a buttermilk mixture. After the brine, I cut the pieces in half. Here’s where I made a small mistake—I didn’t pat the chicken dry before dredging it in the seasoned flour mixture. While leaving some liquid in seemed like a good idea, I now wonder if drying the chicken slightly would have improved the coating.
Step 2: Frying the Chicken (Three Times!)
Frying chicken is always a bit of an adventure. I heated the oil to around 350°F and fried the chicken in small batches until they turned golden brown. After about 10 minutes, I removed the chicken and let it cool.
In my research, I learned that moisture from the chicken can seep into the batter as it cools, making it soggy. To combat this, I fried the chicken a second time to remove any residual moisture and create a crispy exterior. For good measure, I ended up frying the chicken a third time. The result? A beautifully crunchy coating.
Step 3: Making the Sauce
While frying, I prepared the sauce. In a small pan, I sautéed minced garlic in a splash of oil before adding gochujang, soy sauce, rice vinegar, and honey. I kept the heat low to avoid burning the sauce. Once it thickened to a sticky consistency, it was ready for its starring role.
The final step was tossing the fried chicken in the sauce, ensuring each piece was evenly coated. A sprinkle of sesame seeds and chopped scallions completed the dish.
The Taste Test
The chicken was crispy on the outside and juicy on the inside. The buttermilk brine added a subtle tang and ensured the meat was tender and flavorful. The sauce offered a perfect balance of heat and sweetness, with a spicy kick that wasn’t overpowering.
I served my Yangnyeom-Chikin with a side of purple rice, a Korean-dressed green lettuce salad, and an experimental soju yogurt cocktail (which, admittedly, could use some refinement).
Improvements for Next Time
While I was pleased with the results, there’s always room for improvement:
Pat the chicken dry before dredging to help the coating adhere better.
Cut the chicken into smaller, bite-sized pieces for easier handling and more consistent frying.
Yangnyeom-Chikin was a delight to make and eat, and I can’t wait to try it again with these tweaks. If you’re looking for a culinary project that’s rewarding and packed with flavor, I highly recommend giving this a try.
Have you made Yangnyeom-Chikin before? I’d love to hear about your experiences and any tips you have!
Full Recipe in Details
Gochujang Fried Chicken, or Yangnyeom Chicken, is a Korean favorite featuring crispy fried chicken coated in a sweet, spicy, and savory gochujang-based sauce.
